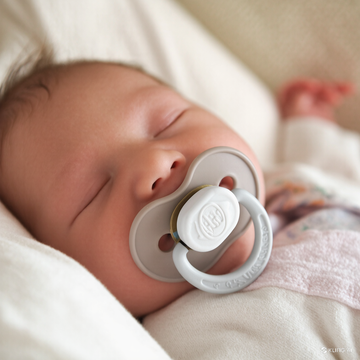
If you’re looking for a fun and cost-effective project, making your own pacifier clip can be both practical and creative. Not only does a DIY pacifier clip keep your baby’s pacifier clean and secure, but it also offers the opportunity to customize it to match your baby’s style. In this guide, we’ll walk you through everything you need to know—from choosing the right materials to step-by-step assembly and important safety tips. Let’s get started!
Table of Contents
- Why Craft Your Own Pacifier Clip?
- Materials & Tools You’ll Need
- Step-by-Step Instructions
- Safety Guidelines & Tips
- Exploring Fun Variations
- Where to Source Quality Supplies
- Final Thoughts
1. Why Craft Your Own Pacifier Clip?
Creating your own pacifier clip not only saves money but also gives you the freedom to design a personalized pacifier clip that suits your baby’s personality. Here are a few reasons to consider a DIY approach:
- Cost Savings: Build an affordable pacifier clip using materials that are inexpensive yet high-quality.
- Customization: Mix and match colors, textures, and patterns to create a clip that reflects your style.
- Control Over Quality: By selecting every component, you ensure that your clip is a safe pacifier clip—free from harmful chemicals and designed to last.
Pro Tip: For more insights on baby safety and accessory quality, refer to HealthyChildren.org.

2. Materials & Tools You’ll Need
Before diving into the project, gather these essential supplies:
- Fastening Clip: A sturdy metal or plastic clip designed to attach to baby clothing. Look for models with smooth edges.
- Cord or Ribbon: A non-toxic, durable material about 7–9 inches long. Options include grosgrain ribbon, braided cord, or silicone string—perfect for a personalized pacifier clip.
- Sewing Supplies: A needle and thread or non-toxic fabric glue for securing components.
- Attachment Loop: A method to create a loop for holding the pacifier securely.
- Decorative Elements (Optional): Beads or fabric pieces can be added for flair. Consider using safe wooden or silicone beads for a unique touch.
Internal Link: For a curated selection of baby-safe materials and decorative accents, visit our Collections Pacifier Clip
3. Step-by-Step Instructions
Step 1: Prepare Your Materials
- Measure & Cut: Cut your chosen cord or ribbon to a length of 7–9 inches. If you’re adding beads, allow extra length for secure knots.
- Inspect Components: Ensure your clip and other parts are free from defects. Safety is key!
Step 2: Secure the Fastening Clip
- Attach to the Cord: Sew the end of the cord firmly to the clip or use a reliable, non-toxic adhesive. Make sure the connection is robust enough to withstand daily use.
Step 3: Add Decorative Details (Optional)
- Customize Your Design: Thread beads or attach fabric elements along the cord. Tie small knots around each bead to prevent them from slipping off.
- Maintain Safety: Avoid adding small, loose pieces that could become choking hazards.
Step 4: Create the Pacifier Loop
- Form a Loop: On the free end of the cord, fashion a loop that will secure the pacifier. Ensure it is large enough for the pacifier’s handle yet snug enough to keep it in place.
- Secure the Loop: Use a strong stitch or adhesive to fix the loop in position.
Step 5: Final Assembly & Inspection
- Test the Connection: Gently tug on each part to confirm that everything holds together securely.
- Trim Excess: Neatly trim any loose threads or excess cord. Optionally, seal the ends of the ribbon to prevent fraying.
External Link: For a visual demonstration, check out DIY Pacifier Clip Tutorials on Parents.com (external link).
4. Safety Guidelines & Tips
When creating your pacifier clip, safety is paramount:
- Correct Length: Keep the cord length between 7–9 inches to avoid any risk of entanglement.
- Regular Inspection: Frequently examine the clip for signs of wear, fraying, or loose parts. Replace if any damage is detected.
- Non-Toxic Materials: Ensure all components are BPA-free, lead-free, and approved for baby use.
- Supervise Usage: Always monitor your baby while they’re using the clip, particularly during playtime or naps.
Note: For more details on safe baby products, refer to the U.S. Consumer Product Safety Commission (external link).
5. Exploring Fun Variations
There are numerous ways to add a personal touch to your pacifier clip:
- Wooden Pacifier Clips: Use safe, untreated wooden beads for a natural, eco-friendly look.
- Silicone Pacifier Clips: Perfect for teething babies—silicone clips are durable, chewable, and easy to clean.
- Patterned Designs: Experiment with different color schemes and patterns to create unique pacifier clip patterns that stand out.
-
Themed Creations: Create special clips for holidays or occasions by incorporating themed colors or charms.
6. Where to Source Quality Supplies
When you’re ready to start your DIY project, consider these options for purchasing supplies:
- Local Craft Stores: Check your nearby craft shops for ribbons, beads, and adhesive supplies.
- Online Marketplaces: Websites like Etsy and Amazon offer a variety of materials for creating your pacifier clip.
- Specialty Baby Retailers: For baby-safe components, explore specialized stores.
- BabyClipStore.com: Our online store features a curated selection of premium baby pacifier accessories, including safe cords and decorative elements for your DIY projects.
7. Final Thoughts
Crafting your own pacifier clip can be a rewarding project that not only saves money but also adds a personal touch to your baby’s accessories. By following our step-by-step guide and prioritizing safety, you can create a DIY pacifier clip that is both functional and stylish.
Remember to:
- Use materials that are safe and non-toxic.
- Keep the cord length within 7–9 inches.
- Regularly inspect your creation for wear and tear.
- Supervise your baby’s use of the clip at all times.
For those who prefer ready-made solutions or need additional supplies, don’t forget to visit BabyClipStore.com for a wide selection of high-quality pacifier clips and accessories.
Happy crafting, and enjoy making something special for your little one!